Tuesday 22 December 2009

Christmas Chocolate Cranberry Brownies

Christmas Chocolate Cranberry Brownies


Have a Happy Christmas and a Peaceful New Year!


Ingredients:
175g unsalted butter
200g dark chocolate
75g cooked cranberries
75g sifted cocoa powder
100g sifted plain flour
1 teaspoon baking powder
300g caster sugar
4 large eggs

Recipe:
Preheat the oven to 180 degrees Centigrade (Gas Mark 4) and line a 20cm x 30cm baking tin with greaseproof paper.

Melt the butter and the chocolate in a bowl over a pan of simmering water, mixing gently until smooth. Stir in the cranberries, then remove the mixture from the heat.

Separately, mix the cocoa powder, flour, baking powder and sugar. Add this mixture to the other, then stir until it’s all combined well.

Beat the eggs, then mix those in too.

Pour the brownie mix into the baking tin, and place in the oven for around 15 to 20 minutes.

After removing the brownies from the oven, allow them to cool in the tray for half an hour before turning them out onto a chopping board and cutting into squares.

This recipe is originally from the BBC's Countryfile Christmas
Picture of finished brownies from BBC website

Tuesday 10 November 2009

Retro Changes

Retro Changes
Some shots taken in the Highlands of Scotland of a recently completed second camper van present (the first one is here) made from this pattern by Leah Sutton. I've modified the wheels by using felt on this version which are now separate from the main body of the van.

Sunday 8 November 2009

Endless Knot


Endless Knot
Dealing with tangled knots in knitting yarn is a frequent occurrence and most annoying. Much more pleasing is this lovely weather worn knot painted on the side of a building in the north of Scotland. The graphic below shows the "unders and overs" which have been lost on the original. This graphic was very kindly sent to me by Jo Edkins, here's a link to her site with further inspiration for Celtic design.


Tuesday 27 October 2009

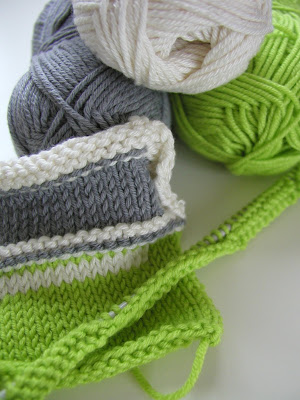
Lime Green Edition

Lime Green Edition...
...is work in progress for a friend for Christmas. The pattern is from Leah Sutton which I used before to make this...

Tuesday 29 September 2009

How to knit a cable


There are many different cable stitches. The following tutorial shows how to knit a basic front cable stitch on a small knitted swatch.

The knitting abbreviation for this particular cable stitch is,

C6F = Cable 6 Front

Work knitting until you reach the 6 cable stitches then:
1. Slip the next 3 stitches onto the cable needle,
2. Hold the cable needle in front of the work,
3. Knit the next 3 stitches from the left hand needle onto the right hand needle.
4. Then knit the stitches from the cable needle onto the right hand needle.


You will need
to be able to cast on
to do knit stitch
to do purl stitch
a small amount of left over yarn
one pair of knitting needles
one cable needle (or you can use a double pointed needle)

Cable Swatch
Cast on 14 stitches.
Row 1: Purl 4, Knit 6, Purl 4.
Row 2: Knit 4, Purl 6, Knit 4.
Row 3: as row 1.
Row 4: as row 3.
Row 5: Purl 4, C6F, Purl 4.  
(Row 5 is shown in the following images).

Keep repeating rows 2-5 to practice the stitch.


Row 5: Purl 4 stitches, then  
1. Slip the next 3 stitches onto the cable needle.


2. Hold the 3 stitches in front of the work.


3. Knit the next 3 stitches from the left needle to the right needle.


4. Knit the 3 stitches from the cable needle onto the right hand needle.


Purl the remaining 4 stitches from the left needle to the right needle, Row 5 is completed.


Continue knitting Rows 2 to 5 and repeat as many times as needed to practice C6F.

Saturday 5 September 2009

limoncello plum tart


Limoncello Plum Tart
One of my lovely friends has given me some surplus fruit from her plum tree. Here's a recipe for a lemony, plum tart, originally from Gino D'Acampo's recipe here. I cheated by using 500g of ready-made short crust pastry, also I used a little less of the liqueur. There was quite a lot of the custard filling left over from this recipe. I used it up by filling some ramekins with the spare mixture and added two slices of fruit to make an alternative desert without the pastry. You can prepare this the morning or the afternoon before the meal.

Ingredients
500g ready-made short crust pastry
zest and juice of 2 unwaxed lemons
4 tbsp double cream
100 ground almonds
200g golden caster sugar
5 eggs
120g butter melted
5 tbsp limoncello liqueur
6 plums cut into wedges ( use more if small plums)

Preparation
1. Roll out the pastry and use to line a loose bottomed-tart tin about 25 cm diameter and about 3.5cm deep. Chill for at least 1 hour.

2. Heat the oven to 180C. Line the pastry with greaseproof paper and fill with baking beans and bake blind for 15 minutes. Remove beans and paper.

3. Put the lemon zest and juice, cream, almonds, sugar, eggs and melted butter in a large bowl and whisk until smooth then stir in the limoncello.

4. Arrange the plums on the base of the pastry case and pour over the custard mixture. Bake at 180C for about 20 minutes then turn off the oven and leave the tart to cool in the oven. Serve decorated with icing sugar.


Sunday 30 August 2009

Touring the Highlands

Touring the Highlands
Earlier this month I mentioned a secret retro knitting project that I was making for a forthcoming birthday present. Here is the finished article, a VW Camper Van (with a few modifications to the design). The pattern is available online from knitwear designer Leah Sutton.

Wednesday 8 July 2009

Checkerboard Cushion Cover


Printable PDF version download now)

About
A chunky knit effect is achieved on this textured cushion cover by using three strands of Aran weight yarn, knitted together as if one strand.


Instructions
Using 3 strands of yarn cast on 35 stitches.
Row 1: (RS): K5,*P5,K5; rep from* to end.
Row 2: P5,*K5,P5; rep from* to end.
Repeat Row 1 and 2.
Row 5: As row 1
Row 6: As row 2
Repeat rows 1 and 2 twice
Repeat from row 1 until work = 21 squares (counted along length of work approximately 77 cm or 30.5 inches).
Continue with next row of squares next and make three buttonholes
Row 1: K5,*P5,K5; rep from* to end.
Row 2: (P5, K2, yo, K2tog, K1) rep 3 times, P5.
Row 3: As Row 1
Row 4: As Row 2
Cast off (5th row).


With right side facing and button holes at the top count down side edge, three squares, mark bottom edge of third square with contrast yarn, this will be the top edge of the cover, fold flap over. From this marker count down ten squares, mark bottom edge of tenth square with contrast yarn (this will be the bottom edge of the cover). Fold this flap up. The final cushion cover is ten checkerboard squares high front and back.

Using matching yarn in double thickness, with right sides together stitch side seams. Position buttons, sew on using felt square on the back of the knitting to reinforce stitches and prevent stitches pulling. Using buttonhole stitch, sew around buttonhole if required. Weave in ends. Block.

Right sides together sew side seams